Friday, October 13, 2017

How to Cut a Large Fish into Steaks

Before beginning this post I have to say that I grew up in Sonoma County, where wildfires have already burned hundreds of homes to the ground (including some that belong to great friends). If there is anything any of my readers can donate to the cause I know it would mean a lot to those who have been displaced. I have heard that people are in need of everything from blankets and cloths, to diapers, and non-perishable food. There are a number of charities and organizations in Sonoma, Napa, and Lake Counties currently taking donations. Please give a little if you can. Thank you! 


Also, before getting into today's post (a step-by-step tutorial on cutting large fish into professional looking steaks at home), let me clearly state that other than select pelagic species, fish, especially salmon, are not safe to eat raw unless frozen to -4 degrees Fahrenheit (-20 degrees C) for a week. This is much colder than most household freezers go. If the fish is not frozen to this temperature for the duration stated above you are risking some seriously bad parasites that can not even be seen in the meat. Additionally salmon spinal fluid contains a toxin that is not harmful to humans but can kill dogs. So please do not feed your dogs bone-in salmon! 

The butchering technique outlined below is one that my brother and I learned from the locals and applied to some tropical barracuda we speared in Cozumel, Mexico about 12 years ago.

My girlfriend and I got out again and again trying to land river run salmon over the past couple of weeks. While I had some momentary hook ups, we were unable to bring a fish to shore. However, our new buddy Allen (who has fished the spot we were at for the last 15-20 years) was landing fish like it was going out of style! So, in Allen's truly selfless style, he gave us two whole fish! 

It was then that I searched the recesses of my brain, pushing aside dirty jokes, anthropological theory, quotes from childhood skate videos and other useless information to access a fish processing method I had not practiced in years.

This is how to "steak out" a large fish.


Step I: Begin by locating the gill plate right behind the pectoral fin just as you would for making the initial cuts for filleting. Place a sturdy filleting knife (this one my brother brought back from spearfishing in South Africa) or cleaver perpendicular to the body of the fish and make a cut stopping at the backbone.


Step II: Next, you will need to give a firm hit or two to the back of your knife blade with a wooden stick, rolling pin, or some other wooden object (*avoid hitting the knife with harder objects to keep from damaging the knife).


Step III: Once through the backbone, continue slicing with the knife until the head is detached. Set the head aside but do not discard it! There is still a ton of good meat on there and we will get to that at the end!


Step IV: Decide whether you want thick or thin steaks and place your knife accordingly on the fish and slice again down to the spine. I usually make salmon steaks about one inch thick.


Step V: Strike the back of the blade again with the wooden billet to sever the backbone and then continue slicing down to the cutting board to free the first steak.


Step VI: Continue with this process until you feel that the steaks are getting a bit small. Then switch over and follow step VII to fillet the tail.


Step VII: Place the knife just above the spine and start your initial cut towards the tail. *Be VERY careful here as you are cutting towards your hand! After about an inch or so, you will switch your grip on the fish to be sure that if the knife slips you will not cut a finger.


Step VIII: Switch your grip on the fish as shown below to keep your fingers out of the way as you fillet. Keep in mind your blade should be just bumping the top of the spine as you cut.


Step IX: Continue through to sever the skin and free the first fillet keeping you anchor hand out of the path of the knife as shown above. Keeping the skin on the fillet is great for grilling, smoking, or freezing. If you want to see how to take the fillet off of the skin, search my blog for "How to fillet a fish." The resulting tail fillet pictured here is 100% boneless.


Step X: Repeat filleting on the other side of the fish. Do not discard the backbone as there is a lot of meat on there. Instead give the tail a cut with the knife and billet method to remove the tail fin, and set the backbone aside. 


Step XI: Now lets remove the collar from the head. The fish's collar is one of my all time favorite parts. However, this part of the fish largely goes unused by western anglers... and I do not know why! Fish collar is fantastic when grilled, broiled or smoked. It is fatty, meaty, and incredibly flavorful!

Start by severing the last connections under the chin. Then use the billet and knife system again, just behind the gill plate to free the collar. Pectoral fins may also be removed from the collar in this way.


As we retained the head for a Korean fish head soup, the only waste out of this whole fish is pictured below!


Step XII: Rinse your fillets in salt water to keep bacteria down and vacuum seal and refrigerate or freeze. Now use the fish head and remaining backbone for an incredible fish head soup! I will post a link to the recipe once it is published.


That's it!

Keep the old ways alive!


Friday, September 29, 2017

Annual Apple Harvest and Cider Pressing

"I love the sound that the apples make when the fall to the ground!" Miss Tu


Late September marked the annual apple harvest and cider pressing party at my family orchard. We missed the Gravenstein and Johnathan apples this year, but Golden Delicious, Rome, and Mare were all still in abundance!


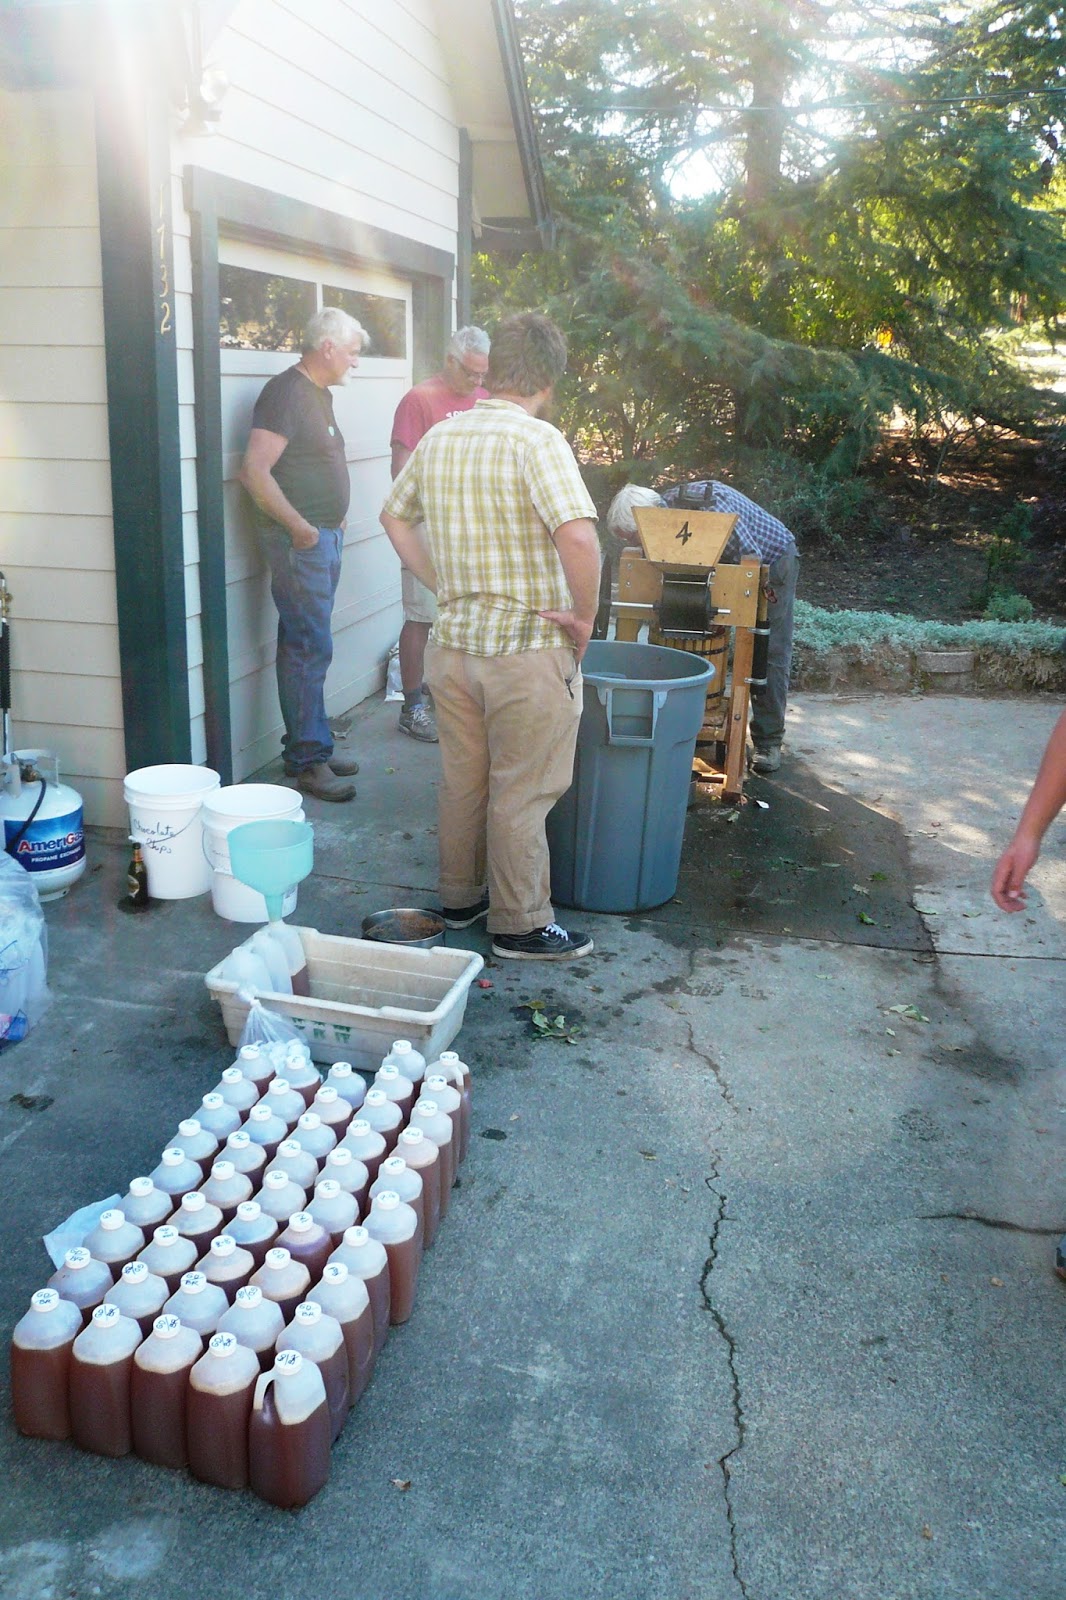
We shook the trees relentlessly and watched as the ripe fruit fell to the ground. Then we swooped them up, gave them a rinse, and it was on to the cider press.


First the apples were crushed in the grinder and the pulp was captured in the mesh-lined hardwood basket. Next, we pressed the apple mush into the sweetest and most flavorful juice you've ever tasted!


It's important not to drink too much apple juice straight off of the press or you will get a belly ache. Instead, the juice should be allowed to sit for 24 hours.


We made off like bandits after pressing the whole day through. Each bottle was labeled so we knew what apple blends we had and that way we can later decide whether we want to make the same blends in future years.


My dad caught a bunch of lingcod over the past month so Martijn, Nicholas, and I beer battered and fried it up to serve alongside the carnitas my mom made. The surf n' turf taco spread was so awesome that I forgot to even snap a photo... finger lickin' good!

My mom also made three apple cakes with apples I picked in the southeast corner of the orchard.

The next morning my mom made her famous biscuits and my dad fried up some bacon and eggs. We were all smiles!


Oh yeah! I totally forgot! The night before the apple harvest I took Diane on her first kayak adventure. We paddled into the darkness to see the bioluminescence in the bay and enjoyed some outstanding shooting stars by boat before pitching a tent on the seashore!

It was a pretty fantastic weekend!

Well, gotta go salmon fishing!

Keep the old ways alive!

Sunday, September 24, 2017

Bioluminescence by Boat, Kayaks, Freediving, Scallops, Camping, and Grilling!

" I don't know if I'll ever eat better camping again...or eat better in general, for that matter!" Eric Huynh

Photos: Eric, Karen, Linh and me.


I got a call from my brother the other day asking of I could make our buddy Lee's annual Maritime Campout. At first I thought that I might not be able to make it as I was preparing for a new archaeological excavation taking place the following week. But when I realized I could, I was on the horn immediately getting the details.

We met at the launch point and Justin had his homemade canoe all set up and ready to go. Once my gear was loaded up and Eric had the rest of the supplies on his inflatable, we paddled a mile across open water to our remote pirate cove.


Eric had speared a couple of nice halibut in southern California the day before and brought the fresh fillets for the grill.


I headed out to a secret spot to seek out rock scallops. Their bright orange lips glowed, even in the murky visibility.


I chose not to take a full limit (10) as we only needed a few for appetizers and a couple to bring home. However I was quite happy with my six!


Eric and I tried a new method of opening the scallops (to get the filleting knife in) using a blade of grass to tickle them. It worked! Well, about half the time. My brother says that to get it to work all the time you must also sing to them during the process.


I got to cleaning scallops...

While Lee brought me some awesome Taiwanese corn!

And while Justin prepared kindling and got a bow drill friction fire going (after I failed). What can I say? I am more of a hand drill guy lol!


While Lee grilled amazing Yakitori and Linh shucked oysters, I served the scallop sashimi appetizer.  A fresh course for our five star beach bum beast feast!


When night fell my brother prepared stew in my Dutch Oven from a deer he just got. He also made some incredible rosemary-raisin bushcraft bannock near the coals.


As the night progressed and the sweets came out, Lee grilled one of his world famous spear tip marshmallows!


The bioluminescence was phenomenal! I wish I could have taken some photos to share with you!

A few trash pandas (aka raccoons) tried to take some food, but were unfortunately dealing with experienced folks who keep a clean camp, but their prints were all around when we woke.


Well this turned out to be one of the best camping trips I have been on in a long time! The incredible food was second only to the company!


Quite a handsome rabble huh?

Well I here apples falling and the cider press is ready... gotta go!

Keep the old ways alive!